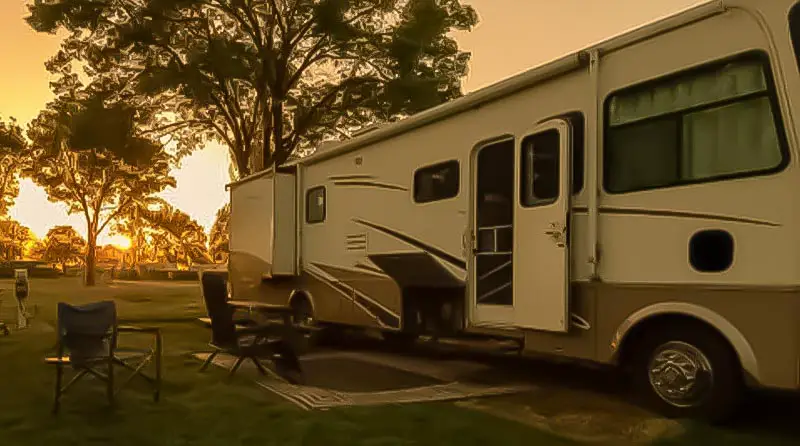
So you had that OH NO! moment when your RV awning just…won’t…unlock? I’ve been there, and it’s a real problem. But fear not! I’ve got the solution for you.
Key Takeaways:
Here’s why an RV awning won’t unlock: incorrect unlocking sequence, tight components, unopened travel locks, tight knobs, power issues, blown fuses, corrosion, and broken arms. Solutions involve correct sequences, lubrication, adjusting knobs, checking power, replacing fuses, addressing rust, and repairing or replacing arms.
Read on for a detailed guide on fixing an RV awning that won’t unlock, along with the top 8 underlying causes and their solutions.
| Possible Causes: | Solutions: |
| Not Unlocking The Awning In The Right Order | Open latches/levers, use the awning rod to unlock, hook the rod into the loop, and pull to extend. Follow sequence. |
| The Awning Could Be Tight | Lubricate the mechanism and extend/retract regularly. |
| Make Sure You Have Opened The Travel Lock/Latches | Identify/adjust the travel lock/latches. Unlock both sides. |
| Make Sure You Loosen The Knobs | Loosen the mid-arm knob on both sides. Tighten after use. |
| Make Sure The Connector Is Getting The Right Power Source | Check power at the top arm. Test separately if needed. Seek pro help if unsure. |
| Problem With The Fuse | Check the fuse panel for the red light. Replace with the correct fuse. Verify labels. Manual options. |
| Corroded Parts | Clean/dry parts. Apply penetrating oil. Replace severely corroded parts. |
| Broken Awning Arm | Avoid use if broken. Straighten minor bends. Replace if major. DIY or pro installation. |
RV Awning Won’t Unlock? Here’s Why And How To Fix It
#1. Not Unlocking The Awning In The Right Order
CAUSE: Now, here’s the deal – these awnings can be finicky. Sometimes, it’s not about what you’re doing but how you’re doing it.
Unlocking your awning in a haphazard sequence?
BINGO! That’s why it’s giving you the cold shoulder.
FIX: Alright, let’s break this down step-by-step. Ready?
- Latches/Knobs/Levers: Start down low. See those latches (knobs or levers, whatever you want to call them) on both sides of the awning? Give them a gentle open-up. If your awning has a little black knob down there – and many do – loosen that up. Remember, both sides, okay?
- Awning Rod Time: Next, grab your trusty awning rod. It’s that hook-like rod. Look up high on the awning near the RV roof. See that lever? Yep, that’s the one! Unlock and open on both sides. Use that rod to push it to the open position.
- Hook the Rod: Now, this is where the magic happens. Hook the rod into that black loop (usually just above your camper door).
- Pull it Out: Hold that rod firmly and pull it straight out. VOILA! Your awning should easily unlock and extend out.
Now, if you’ve followed me through all these steps in this EXACT order – travel lock, black knob, top lever, and loop – you should have an unlocked awning ready to go!
By the way, remember you can change your awning height by adjusting the arms to your liking.
#2. The Awning Could Be Tight
CAUSE: First off, let’s dive into the why. Awnings; with time, they can get set in their ways.
It’s been a while since you last extended yours, or perhaps the bits and pieces of the awning rod have tightened up from the usual wear and tear.
FIX: How do we coax our awning to relax and stretch out?
Lubricate the Joints. If it’s not the fabric but the awning’s arms or mechanism that’s tight, a squirt of an excellent RV-friendly lubricant can do wonders. Remember to give it a minute to sink in, then try extending the awning again.
Also, staying regular is key. The more frequently you extend and retract your awning; the easier it’ll be to operate. Think of it as giving your awning a little exercise routine.
In case you’re new to RV, you might also want to check out these guides:
- What Are The Most Common RV Terms And Jargons?
- A Complete Beginner’s Guide To RV Classes
- What Are The Largest RV Manufacturers And Brands?
#3. Make Sure You Have Opened The Travel Lock/Latches
CAUSE: Remember the safety belts in those classic cars? The travel lock or latches on your RV awning serve a similar purpose.
Their primary job is to maintain the tension of the awning during your travels, ensuring it stays snug and secure. It’s like the awning’s personal seat belt.
Without opening them, you’re essentially trying to pull out your awning with its safety harness still on. Sounds counterproductive, doesn’t it?
So, why is this lever so crucial? When locked, it ensures that our awning doesn’t flail around during those highway drives, potentially causing damage or an accident.
The tension held by these latches keeps everything in place, and only by moving them to the open position can we free our awning to stretch its legs, or rather, its fabric.
FIX: Now that we know the importance, how do we make amends?
- Spot the Latch: First, identify where the travel lock or latches are located. Typically, they’re on the awning arms or somewhere close to the top.
- Gentle Handling: Using a bit of care – move the latch to the open position. Sometimes they might be a tad stiff, mainly if they haven’t been used in a while. Remember the first time you tried opening a pickle jar? It’s a bit like that.
- Double Check: It might sound obvious, but ensure you’ve unlocked both sides. An awning is a team player; both sides must be in sync to work smoothly.
- Extend with Confidence: Once you’re sure the travel locks are open, go ahead and extend your awning. It should glide much more easily now.
#4. Make Sure You Loosen The Knobs
CAUSE: Next is the knob – located midway on that awning arm, and it packs quite a punch. What’s its job? Well, it manages the operation of your awning. Yep, this little guy controls tension and ensures the awning’s smooth opening and closing.
Missed loosening it?
Oops! That could be a reason why your RV awning is stuck and won’t unlock.
FIX: Now that we’re in the know, let’s tackle this head-on.
- Spot the Knob: Find it? Good. It’s usually midway on the awning arm.
- Loosen It A Bit: Turn the knob counterclockwise and loosen it a bit (not entirely, or else the whole knob will come out!)
- Both Sides Matter: Don’t forget! Make sure both knobs are appropriately loosened.
- Give it a Gentle Pull: With the knobs loosened, your awning should extend smoothly. No more resistance!
- Secure After Use: Done enjoying the shade? When retracting, remember to tighten those knobs back up. It’s like buckling up for safety.
#5. Make Sure The Connector Is Getting The Right Power Source
CAUSE: We’ve come a long way, haven’t we? From manual tasks to automated wonders, our RVs are no different. Power is the heartbeat of operation for those with automated RV awnings.
Now, what if your awning doesn’t budge?
It could be a power hiccup. And it can be downright frustrating.
FIX: Before you throw your hands up in despair, let’s troubleshoot this together.
- Inspect Forward: Your first port of call? The top forward awning arm assembly. Take a good look there.
- Test Run: If you’re feeling adventurous, and only if you have the necessary tools, connect a separate power source. Does your awning stir to life? That test could reveal the root of the mystery.
But a word of caution.
Electricity? It’s no child’s play.
Confused? Unsure? Well, it’s best for some expert intervention. So don’t hesitate to call in the Pros. This step can be intricate. And you want your awning to last the miles. So, why not hand over the reins to professional RV experts? They’ve got the tools, the know-how, and the experience.
NOTICE: The Significance of Lubricating Your RV Awning
Proper lubrication of your RV awning is not just a maintenance routine; it’s a vital step in preserving its functionality and extending its lifespan.
The correct lubricant, specifically designed for RV awnings or those safe for rubber and fabric, can prevent wear and tear, reduce noise, and ensure smooth operation. Conversely, neglecting this simple task or using inappropriate products can lead to premature degradation, increased friction, and potential malfunction.
#6. Problem With The Fuse
CAUSE: Now, if you’re the owner of an electric awning, you’ve embraced the convenience of push-button luxury. But ever pushed that awning button and… nothing? Silence. No whirring. No movement.
Before you start worrying about the good old manual days, there is a tiny culprit – a fuse.
When that awning refuses to budge, and you spot a mysterious red light in the fuse panel, that’s your RV’s subtle way of saying, “Hey, we’ve got a fuse issue!”
FIX: Alright, let’s get our hands a little dirty and tackle this together.
- Red Light Alert: Push those awning extension buttons. No movement? Check the fuse panel. If a red light greets you, it’s time to bid farewell to that blown fuse.
- Discard That Faulty Fuse: Gently remove the unresponsive fuse.
- In With the New: Got a new 15 amp fuse? Perfect. Slide that little savior in. Remember, it’s all about the right fit.
Time for Some Detective Work. That pre-labeled fuse manual guide? Give it a once-over. If something seems off, trust your gut (and your eyes). Make the necessary corrections to the labels.
Manual to the Rescue. If your awning plays hard to get and you can’t immediately solve the fuse riddle, there’s always a backup plan.
Locate a discreet black cap on your awning. Inside? A 7/16 nut. Give it a turn. Whether you need to retract or extend, this little nut’s got your back.
Fuse troubles can be a hiccup on the open road. But with a touch of patience and a sprinkle of know-how, you’ll be back to enjoying your RV’s shade in no time.
#7. Corroded Parts
CAUSE: So, you’ve been enjoying the open road, rain or shine, huh?
But don’t forget those tiny spots or rust-colored stains on your RV awning parts. That’s corrosion. It’s what happens when metal parts get exposed to moisture and air for extended periods.
And let me tell you, corrosion doesn’t just spoil the looks; it can jam up the entire awning mechanism like it does any other mechanical part.
Fix: First off, prevention is better than cure. Regularly clean and dry your awning and its parts. But if you’re past that point, try some WD-40 or similar penetrating oil.
Spray it generously on the corroded parts, let it sit for a bit, then try moving the awning. Consider replacing the corroded parts if things are way past what could be fixed.
A smooth-operating awning is worth the effort, trust me.
#8. Broken Awning Arm
CAUSE: Imagine your RV awning as a person stretching out its arms, with the awning arm being, well, the arm! The awning arm can break or bend with repeated use, exposure to the elements, or an accidental bump (remember that tree at the campsite last summer?).
When this happens, the whole extension and retraction action that your awning does? It stumbles. Badly.
FIX: First, SAFETY. If you notice a broken arm, avoid trying to open or close the awning. You don’t want to add injury to the process.
Instead, inspect the damage. If it’s a minor bend, you can straighten it out with some gentle persuasion (use tools, not bare hands).
If it’s beyond repair, it’s time for a replacement. Head to your nearest RV parts shop or check online. Installation can be a DIY job if you’re handy, but you can also consider professional help.
How To Completely Get Rid Of RV Awning?
Now let’s say you tried everything, but your RV awning won’t unlock. And say, for now, you don’t want to repair it as well. So what’s next? Are you thinking of completely removing the awning and repairing it later?
Here’s what you can do:
- Safety First: Before starting, ensure your RV is on stable ground. Wear gloves to protect your hands, and if possible, have a buddy help you out. Two pairs of hands are better than one!
- Roll It In: Begin by rolling the awning in. Working with it is easier when it’s in a retracted position. Also, ensure you have all your necessary tools handy.
- Disconnect Power (If It’s Electric): If your awning is electric, make sure to disconnect the power. You don’t want any surprise movements!
- Detach The Arms: Look for the mounting brackets that secure the awning arms to the RV. These will typically be bolted in. Using a wrench or socket set, carefully remove the bolts or screws. As you’re doing this, be cautious; the awning can get a little wobbly. Remember to take the help of your friends or other family members!
- Remove The Awning From The Rail: The RV has a rail where the awning is fed into. With the arms detached, start at one end, gently pulling the awning fabric out of this rail. It can be stubborn, but it’ll come free with steady, gentle pressure.
- Disposing of the Awning: You can’t just toss an awning into your regular trash. Check with local disposal guidelines. Some recycling centers might accept it, or you may need to dispose of it as bulky waste.
And there you have it! Time to enjoy that uninterrupted view or think about a new shade solution?
Before You Leave: A Parting Gift of Wisdom!
In short, navigating the world of RVing can have its hitches, and when your RV awning doesn’t unlock, it can be a real mood dampener. Remember, the usual suspects include incorrect sequences, tight parts, unopened locks, and more. But every problem has its fix!
Keen to dive deeper into other RV troubleshooting? Check out these guides on our website: why your RV water is yellow, solutions if your RV water’s too hot, and how to tell if your RV vent pipe is clogged. Safe travels and happy RVing!