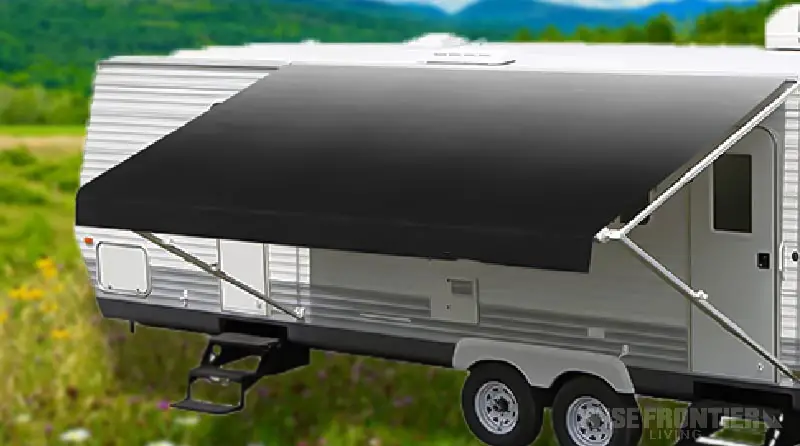
RV awnings are essential components that provide shade, and protection from the elements, and enhance the overall outdoor experience when camping or parking.
However, like all parts of an RV, awnings can face various issues over time due to wear and tear, environmental factors, or unexpected incidents. Addressing these issues promptly and effectively is crucial to ensure the longevity of your awning and to maintain the safety and comfort of your RV experience.
This high-level basic guide is only meant to provide an overview of potential issues.
We’ll walk you through step-by-step solutions to common problems RV awnings face, whether you’re dealing with water pooling, or noisy operation.
Disclaimer:
Due to the wide variety of RVs in the industry, We cannot provide personalized technical advice. Our information is intended for general educational purposes only and should not be construed as specialized technical advice for any specific situation. Any decisions made based on information provided by us are the sole responsibility of the individual. It is always recommended to seek additional advice from a professional before making any critical mechanical changes or repairs to the RV.
Let’s dive into the solutions!
| Issue | Potential Causes | Brief Solutions |
|---|---|---|
| 1. Stuck or Jammed Awning | – Debris or dirt in the mechanism. – Damaged or bent hardware. – Motor or electrical issues. | – Clean and remove debris. – Replace or repair hardware. – Check electrical connections or motor. |
| 2. Tears or Holes in the Fabric | – Wear and tear. – Damage from sharp objects or branches. – UV damage. | – Patch or replace fabric. – Avoid parking near sharp objects. – Use UV protectant. |
| 3. Water Pooling | – Incorrect tension or sagging. – Accumulation of debris. | – Adjust tension. – Clean off debris regularly. |
| 4. Noisy Operation | – Lack of lubrication. – Misalignment of components. – Loose hardware. | – Lubricate moving parts. – Realign components. – Tighten hardware. |
| 5. Awning Doesn’t Retract Fully or Evenly | – Stretched or damaged springs. – Misaligned or bent roller tube. – Motor or electrical issues. | – Replace springs. – Align roller tube. – Check motor or electrical components. |
| 6. Awning Extends or Retracts Too Slowly | – Weak or dying battery. – Motor issues. – Resistance due to debris or lack of lubrication. | – Charge or replace battery. – Repair or replace motor. – Clean and lubricate. |
| 7. Flapping or Billowing in the Wind | – Insufficient tension. – Damaged or missing hold-down straps or brackets. | – Adjust tension. – Replace or add straps/brackets. |
| 8. Mold or Mildew Growth | – Storing the awning wet or damp. – Lack of airflow or sunlight exposure. | – Dry before storing. – Ensure good ventilation and exposure to sunlight. |
| 9. Fading or Discoloration | – Prolonged exposure to UV rays. – Chemical damage from cleaning agents or environmental factors. | – Use UV protectant. – Use mild cleaning agents. |
| 10. Damaged or Malfunctioning Sensors | – Faulty sensors. – Electrical or wiring issues. | – Replace sensors. – Check and repair wiring. |
| 11. Bent or Damaged Hardware | – Impact damage. – Overextension or over-retraction of the awning. | – Replace damaged hardware. – Ensure proper use to avoid overextension. |
1. Stuck or Jammed Awning: Step-by-Step Guide
For Debris or Dirt in the Mechanism:
1. Safety First:
- Ensure the RV is on level ground and stabilized.
- Have a partner assist you if you need to manually extend or retract the awning.
2. Visual Inspection:
- Look for any visible obstructions, debris, or dirt in the awning’s mechanism.
3. Clean the Mechanism:
- Using a soft brush, gently brush away any debris or dirt from the awning’s tracks and other components.
- For stubborn dirt, use a mild detergent mixed with water and a soft cloth to clean. Rinse thoroughly and let dry.
4. Test the Awning:
- After cleaning, try to extend or retract the awning to see if the problem is resolved.
Check out this complete guide I created for manual RV awnings that won’t unlock here.
For Damaged or Bent Hardware:
1. Safety First:
- Ensure the RV is on level ground and stabilized.
- Have a partner assist you if you need to extend or retract the awning manually.
2. Visual Inspection:
- Check for any bent or damaged hardware components.
3. Replace or Repair:
- If any parts are damaged or bent, consider replacing them. Some minor bends might be corrected with tools, but replacement is often the best solution for significant damage.
4. Test the Awning:
- After making repairs, try to extend or retract the awning to see if the problem is resolved.
For Motor or Electrical Issues (for powered awnings):
1. Safety First:
- Disconnect the RV from any power source.
- Ensure the RV is on level ground and stabilized.
2. Listen to the Motor:
- Try to operate the awning and listen for any sounds from the motor. A humming sound might indicate the motor is trying to work but is obstructed.
3. Check Electrical Connections:
- Inspect the wiring for any visible damage or disconnections.
- Ensure all electrical connections are secure.
4. Manual Override:
- Consult your awning’s user manual for instructions on how to manually override the motor. This can help you retract or extend the awning manually to free up any jams.
5. Test for Power:
- If you’re comfortable with electrical work, use a multimeter to check for power at the motor. If there’s no power, there might be an issue with the switch, wiring, or fuse.
6. Consider Professional Help:
- If the motor or electrical components seem to be the issue and you’re unsure about the next steps, consult with an RV technician or awning specialist.
2. Tears or Holes in the Fabric: Step-by-Step Guide
For Wear and Tear:
1. Inspection:
- Regularly inspect the awning fabric for signs of wear and tear, especially if it’s been in use for several years.
2. Patching:
- For minor wear, consider using an RV awning repair tape or patch kit. Clean the area around the wear, apply the patch, and ensure it’s firmly in place.
3. Replacement:
- If the wear is extensive, it might be time to consider replacing the entire awning fabric.
4. Preventative Measures:
- Regularly clean the awning fabric with mild soap and water to prevent buildup that can accelerate wear.
- Use UV protectant sprays to protect the fabric from sun damage.
For Damage from Sharp Objects or Branches:
1. Inspection:
- If you’ve camped near trees or sharp objects, inspect the awning for any cuts or punctures.
2. Patching:
- Clean the area around the damage and use an RV awning repair tape or patch kit to seal any holes or tears.
3. Preventative Measures:
- Be cautious when extending the awning in areas with trees or other potential hazards.
- Consider using an awning guard or protector when the awning is retracted.
For UV Damage:
1. Inspection:
- Check the fabric for signs of brittleness or discoloration, which can be indicative of UV damage.
2. UV Protection:
- Use UV protectant sprays designed for RV awnings to protect the fabric from further damage.
3. Replacement:
- If the fabric has become extremely brittle or shows extensive UV damage, it’s advisable to replace the entire fabric.
4. Preventative Measures:
- When not in use, retract the awning to minimize exposure to direct sunlight.
- Consider using an awning cover or storing the RV in a shaded area.
3. Water Pooling: Step-by-Step Guide
For Incorrect Tension or Sagging:
1. Inspection:
- Extend the awning and observe if there’s a noticeable sag or if the fabric isn’t taut.
2. Adjust Tension:
- Many awnings have adjustable arms or tension settings. Consult your awning’s manual and adjust the tension to ensure the fabric is taut.
3. Check Springs:
- If adjusting the tension doesn’t resolve the issue, the internal springs might be worn out. These springs help keep the fabric taut.
4. Replacement:
- If the springs are damaged or have lost their tension, consider replacing them. This task can be complex, so you might want to consult with an RV technician or awning specialist.
5. Preventative Measures:
- Regularly check the tension of your awning and adjust as necessary to prevent water from pooling.
For Accumulation of Debris:
1. Inspection:
- Extend the awning and check for leaves, twigs, or other debris that might be causing water to pool.
2. Clean the Awning:
- Use a soft brush or broom to gently remove debris from the awning fabric. For stubborn dirt or stains, use a mild detergent mixed with water and a soft cloth to clean. Rinse thoroughly and let dry.
3. Regular Maintenance:
- After camping or parking under trees, always check and clean the awning before retracting it. This prevents debris from getting trapped and causing water to pool the next time you extend it.
4. Preventative Measures:
- If you frequently camp in areas with lots of trees, consider using an awning screen or mesh to reduce the accumulation of debris.
General Tips:
- After heavy rainfall, it’s a good practice to retract and then extend the awning to shake off any pooled water.
- Always retract the awning during storms or high winds to prevent damage.
- Consider installing an automatic retraction system if your awning doesn’t already have one. This system will retract the awning based on wind speed, reducing the risk of water pooling and potential damage.
4. Noisy Operation: Step-by-Step Guide
For Lack of Lubrication:
1. Safety First:
- Ensure the RV is on level ground and stabilized.
- Have a partner assist you if you need to manually extend or retract the awning.
2. Identify Moving Parts:
- Extend the awning and identify pivot points, rollers, and other moving components.
3. Apply Lubricant:
- Use a suitable RV awning lubricant or a silicone-based lubricant.
- Apply sparingly to the moving parts, ensuring not to over-lubricate.
4. Operate the Awning:
- Retract and extend the awning a few times to distribute the lubricant and check for noise reduction.
5. Regular Maintenance:
- Periodically lubricate the moving parts to prevent future noise and ensure smooth operation.
For Misalignment of Components:
1. Safety First:
- Ensure the RV is on level ground and stabilized.
- Have a partner assist you if you need to manually extend or retract the awning.
2. Visual Inspection:
- Check the awning for any visibly misaligned parts or components that might be rubbing against each other.
3. Adjust and Realign:
- Based on your awning’s manual, adjust or realign the components to their proper positions.
- Ensure there’s no unnecessary friction between parts.
4. Test the Awning:
- Operate the awning to see if the noise has been reduced or eliminated.
For Loose Hardware:
1. Safety First:
- Ensure the RV is on level ground and stabilized.
- Have a partner assist you if you need to manually extend or retract the awning.
2. Check Hardware:
- Inspect all bolts, screws, and other hardware components of the awning.
3. Tighten Components:
- Using appropriate tools, tighten any loose components to ensure they’re secure.
4. Test the Awning:
- Operate the awning to see if the noise has been reduced or eliminated.
5. Regular Maintenance:
- Periodically inspect and tighten hardware as part of your routine maintenance to prevent future noise.
5. Awning Doesn’t Retract Fully or Evenly: Step-by-Step Guide
For Stretched or Damaged Springs:
1. Safety First:
- Ensure the RV is on level ground and stabilized.
- Have a partner assist you if you need to manually extend or retract the awning.
2. Visual Inspection:
- Extend the awning and inspect the springs for any signs of damage or overstretching.
3. Replace Springs:
- If the springs appear damaged or overly stretched, consider replacing them. This task can be complex due to the tension in the springs, so professional assistance might be advisable.
4. Test the Awning:
- After replacing or adjusting the springs, operate the awning to see if it retracts fully and evenly.
For Misaligned or Bent Roller Tube:
1. Safety First:
- Ensure the RV is on level ground and stabilized.
- Have a partner assist you if you need to manually extend or retract the awning.
2. Visual Inspection:
- Check the roller tube for any visible bends or misalignment.
3. Straighten or Replace:
- If the roller tube is slightly bent, you might be able to straighten it with careful pressure. However, if the bend is severe, consider replacing the roller tube.
- Ensure the awning fabric is evenly distributed on the roller after any adjustments.
4. Test the Awning:
- Operate the awning to see if it retracts fully and evenly.
For Motor or Electrical Issues (for powered awnings):
1. Safety First:
- Disconnect the RV from any power source.
- Ensure the RV is on level ground and stabilized.
2. Listen to the Motor:
- Try to operate the awning and listen for any unusual sounds from the motor. A lack of sound or irregular sounds might indicate an issue.
3. Check Electrical Connections:
- Inspect the wiring and connections related to the awning motor. Ensure all connections are secure and free from damage.
4. Manual Override:
- If the motor isn’t functioning, consult your awning’s user manual for instructions on manual override. This allows you to retract or extend the awning manually.
5. Consider Professional Help:
- If the motor or electrical components seem to be the issue and you’re unsure about the next steps, consult with an RV technician or awning specialist.
6. Awning Extends or Retracts Too Slowly: Step-by-Step Guide
For Weak or Dying Battery (for powered awnings):
1. Safety First:
- Disconnect the RV from any power source.
- Ensure the RV is on level ground and stabilized.
2. Test the Battery:
- Use a multimeter or battery tester to check the voltage of the RV’s battery or the specific battery powering the awning.
3. Charge or Replace:
- If the battery voltage is low, charge it to its full capacity.
- If the battery is old or fails to hold a charge, consider replacing it.
4. Test the Awning:
- After addressing the battery issue, operate the awning to see if it extends or retracts at its normal speed.
For Motor Issues:
1. Safety First:
- Disconnect the RV from any power source.
- Ensure the RV is on level ground and stabilized.
2. Listen to the Motor:
- Operate the awning and listen for any unusual sounds or irregularities from the motor.
3. Check for Obstructions:
- Ensure there are no obstructions or debris around the motor or in the awning’s mechanism that might be causing resistance.
4. Lubricate Moving Parts:
- Apply a suitable RV awning lubricant to the moving parts, ensuring not to over-lubricate.
5. Consider Professional Help:
- If the motor continues to operate slowly or shows signs of wear, consult with an RV technician or awning specialist for potential repair or replacement.
For Resistance Due to Debris or Lack of Lubrication:
1. Safety First:
- Ensure the RV is on level ground and stabilized.
- Have a partner assist you if you need to manually extend or retract the awning.
2. Clean and Lubricate:
- Clean any visible debris from the awning’s tracks and other components.
- Apply a suitable lubricant to the moving parts to ensure smooth operation.
3. Test the Awning:
- After cleaning and lubricating, operate the awning to see if it extends or retracts more smoothly.
4. Regular Maintenance:
- Periodically clean and lubricate the awning components to prevent future resistance and ensure smooth operation.
7. Flapping or Billowing in the Wind: Step-by-Step Guide
For Insufficient Tension:
1. Safety First:
- Ensure the RV is on level ground and stabilized.
- Have a partner assist you if you need to manually adjust the awning.
2. Visual Inspection:
- Extend the awning and observe if the fabric is taut or if there’s noticeable slack.
3. Adjust Tension:
- Many awnings have adjustable arms or tension settings. Consult your awning’s manual and adjust the tension to ensure the fabric is taut.
4. Check Springs:
- If adjusting the tension doesn’t resolve the issue, the internal springs might be worn out. These springs help keep the fabric taut.
5. Replacement or Adjustment:
- If the springs are damaged or have lost their tension, consider replacing them or adjusting their tension. This task can be complex, so professional assistance might be advisable.
6. Test the Awning:
- After adjusting or replacing springs, operate the awning to see if the flapping has been reduced.
For Damaged or Missing Hold-Down Straps or Brackets:
1. Safety First:
- Ensure the RV is on level ground and stabilized.
- Have a partner assist you if you need to manually adjust the awning.
2. Visual Inspection:
- Check the awning for any missing or damaged straps or brackets that help secure it.
3. Replace or Repair:
- Attach new hold-down straps or brackets if they’re missing.
- Repair or replace any damaged components.
4. Test the Awning:
- After adding or repairing straps or brackets, operate the awning to see if the flapping has been reduced.
5. Consider Additional Supports:
- If you’re in a particularly windy area, consider adding additional straps or supports for added stability.
General Tips:
- Always retract the awning during storms or high winds to prevent damage.
- Consider installing an automatic retraction system if your awning doesn’t already have one. This system will retract the awning based on wind speed, reducing the risk of flapping and potential damage.
- Regularly inspect the awning fabric for any signs of wear or damage, as weakened fabric can be more susceptible to wind damage.
9. Fading or Discoloration: Step-by-Step Guide
For Prolonged Exposure to UV Rays:
1. Safety First:
- Ensure the RV is on level ground and stabilized.
2. Visual Inspection:
- Extend the awning fully and inspect for signs of fading or discoloration, which can appear as lighter patches or uneven color.
3. UV Protection:
- Use UV protectant sprays designed for RV awnings or outdoor fabrics. These sprays can help reduce further fading and protect the fabric from harmful UV rays.
4. Rotate the Awning (if possible):
- Some awnings allow for the fabric to be rotated on the roller. This can help even out the exposure and reduce noticeable fading.
5. Prevention:
- Consider retracting the awning when not in use to reduce prolonged exposure to direct sunlight.
- Use awning covers or shades to protect the fabric from UV rays.
For Chemical Damage from Cleaning Agents or Environmental Factors:
1. Safety First:
- Ensure the RV is on level ground and stabilized.
2. Visual Inspection:
- Extend the awning and inspect for any discoloration or damage that might be a result of chemical exposure.
3. Proper Cleaning:
- Always use recommended cleaning agents for awning fabrics. Avoid harsh chemicals or bleach.
- Rinse the awning thoroughly after cleaning to remove any residue.
4. Prevention:
- Avoid parking the RV in areas where the awning might be exposed to harmful chemicals, such as near industrial areas or places where pesticides are sprayed.
- Always follow manufacturer guidelines when cleaning the awning.
General Tips:
- Regularly clean the awning with mild soap and water to prevent buildup that can accelerate fading.
- If fading is severe and affects the integrity or appearance of the awning, consider replacing the fabric.
- Using awning shades or screens can not only protect against UV rays but also provide additional cooling benefits underneath the awning.
Remember, always refer to your RV and awning’s specific user manuals, as there might be model-specific instructions or precautions to consider. Regular maintenance and protection from harmful elements can prevent fading and discoloration, ensuring your awning remains vibrant and functional.
8. Mold or Mildew Growth: Step-by-Step Guide
For Storing the Awning Wet or Damp:
1. Safety First:
- Ensure the RV is on level ground and stabilized.
- Wear gloves and a mask, as mold and mildew can be harmful to health.
2. Visual Inspection:
- Extend the awning fully and inspect for signs of mold or mildew, which can appear as dark spots or patches.
3. Cleaning:
- Mix a solution of water and mild detergent or a specialized mold/mildew cleaner.
- Using a soft brush or cloth, gently scrub the affected areas.
- Rinse thoroughly with clean water.
4. Drying:
- Allow the awning to air dry completely in sunlight. Sunlight can help kill mold and mildew spores.
5. Prevention:
- Always ensure the awning is completely dry before retracting.
- If it gets wet from rain or dew, extend it later in the day to let it dry out.
For Lack of Airflow or Sunlight Exposure:
1. Safety First:
- Ensure the RV is on level ground and stabilized.
- Wear gloves and a mask when dealing with mold or mildew.
2. Extend the Awning:
- Periodically extend the awning on sunny days, especially if the RV is parked in shaded areas for extended periods.
3. Cleaning:
- If mold or mildew is present, clean the fabric using the method described above.
4. Prevention:
- Ensure good ventilation around the awning area.
- Consider repositioning the RV periodically to ensure the awning gets sunlight, which can prevent mold and mildew growth.
General Tips:
- Consider using mold and mildew preventatives available for fabrics.
- If mold or mildew is a recurring issue, inspect the surrounding areas of the RV for sources of excessive moisture and address them.
- In cases of severe mold or mildew infestation, where the integrity of the awning fabric is compromised, consider replacing the fabric.
10. Damaged or Malfunctioning Sensors: Step-by-Step Guide
For Faulty Wind or Rain Sensors:
1. Safety First:
- Disconnect the RV from any power source.
- Ensure the RV is on level ground and stabilized.
2. Visual Inspection:
- Check the sensors for any visible damage, debris, or obstructions that might be affecting their function.
3. Clean the Sensors:
- Gently clean the sensors using a soft cloth to remove any dirt or debris. This can help ensure they function correctly.
4. Test the Sensors:
- After cleaning, test the sensors by simulating the conditions they’re meant to detect (e.g., for a wind sensor, you might use a fan). See if the awning reacts appropriately.
5. Check Connections:
- Ensure that the sensors are properly connected to the awning’s control system. Loose or damaged wires can affect functionality.
For Electrical or Wiring Issues:
1. Safety First:
- Disconnect the RV from any power source.
- Ensure the RV is on level ground and stabilized.
2. Visual Inspection:
- Examine the wiring connected to the sensors for any visible damage, wear, or disconnections.
3. Secure Connections:
- Ensure all connections are secure and that there’s no corrosion or damage at connection points.
4. Test the System:
- After checking and securing connections, test the awning’s automatic retraction system to see if it responds to the sensors.
For Sensor Replacement:
1. Safety First:
- Disconnect the RV from any power source.
- Ensure the RV is on level ground and stabilized.
2. Remove the Old Sensor:
- Based on the manufacturer’s instructions, carefully remove the malfunctioning sensor.
3. Install the New Sensor:
- Install the replacement sensor, ensuring it’s properly connected to the awning’s control system.
4. Test the New Sensor:
- After installation, test the new sensor’s functionality by simulating the conditions it’s meant to detect.
General Tips:
- Regularly inspect sensors for dirt or obstructions, especially if the RV is parked in areas with a lot of debris or dust.
- Always refer to the awning’s user manual when troubleshooting or replacing sensors, as there might be model-specific guidelines.
- If unsure about the issue or the replacement process, consider consulting with an RV technician or awning specialist.
11. Bent or Damaged Hardware: Step-by-Step Guide
For Impact Damage:
1. Safety First:
- Ensure the RV is on level ground and stabilized.
- Have a partner assist you if you need to manually extend or retract the awning.
2. Visual Inspection:
- Extend the awning and inspect for any visible damage to the arms, brackets, or other hardware components.
3. Straighten or Adjust:
- If the damage is minor, you might be able to carefully straighten or adjust the bent components using appropriate tools.
4. Replace Damaged Parts:
- For more severe damage, it’s often best to replace the damaged hardware. Consult your awning’s manual for part numbers and replacement instructions.
5. Test the Awning:
- After making repairs or replacements, operate the awning to ensure it functions smoothly and without issues.
For Overextension or Over-retraction of the Awning:
1. Safety First:
- Ensure the RV is on level ground and stabilized.
- Have a partner assist you if you need to manually extend or retract the awning.
2. Check Limits:
- Ensure you’re not overextending or over-retracting the awning, which can lead to hardware stress or damage.
3. Adjust Limit Switches (for powered awnings):
- Some powered awnings have limit switches that determine how far the awning extends or retracts. Adjust these according to the manufacturer’s guidelines if necessary.
4. Regular Inspection:
- Periodically inspect the awning’s hardware for signs of stress or potential damage, especially if you’ve had issues with overextension in the past.
General Tips:
- Always follow the manufacturer’s guidelines when extending or retracting the awning to prevent potential damage.
- Regularly inspect the awning’s hardware, especially after storms or incidents that might have caused impact.
- If you’re unsure about the extent of the damage or how to make repairs, consult with an RV technician or awning specialist.




Leave a Reply