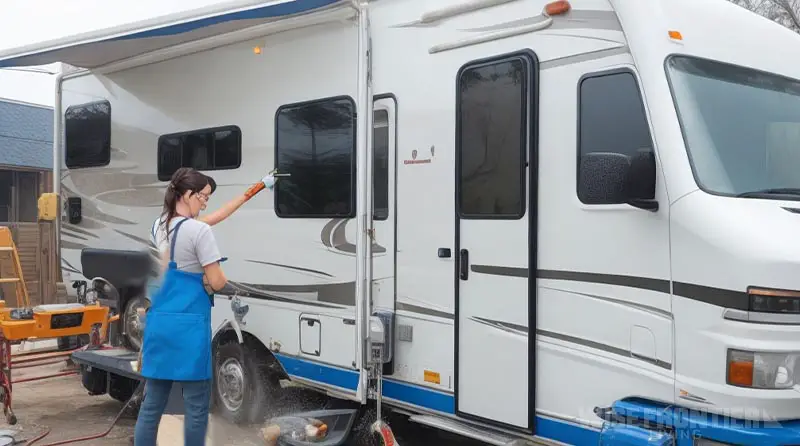
Recreational vehicles (RVs) are a blend of a home and a vehicle, offering both comfort and mobility. Just like any other vehicle or home, RVs require regular maintenance to ensure they function optimally and safely.
One of the essential aspects of RV maintenance is lubrication. Proper lubrication reduces friction, prevents wear and tear, and extends the lifespan of various components. Here’s a guide to the common areas in an RV that need lubricant:
1. Lubricate Slide-Out Rails and Mechanisms
Slide-outs are a common feature in many RVs, providing extra space when the vehicle is parked. The rails and mechanisms that allow these slide-outs to move can become stiff or misaligned without proper lubrication. Use a high-quality lubricant designed for slide-outs to ensure smooth operation.
Maintaining the slide-out rails and mechanisms of your RV is crucial to ensure smooth operation and prolong the lifespan of the components. Lubricating these parts can prevent wear and tear, reduce friction, and prevent rust. Here’s a step-by-step guide on how to lubricate your RV’s slide-out rails and mechanisms:
Safety First:
- Disconnect Power: Ensure that the RV is not connected to any power source. If you have an electric slide-out, disconnect the battery or turn off the RV’s power to avoid any accidental movement.
- Stabilize the RV: Make sure your RV is on level ground and stabilized. Use leveling jacks if available.
Cleaning the Slide-Out Rails and Mechanisms:
- Extend the Slide-Out: Fully extend the slide-out to access the rails and mechanisms.
- Clean the Rails: Using a clean cloth, wipe down the slide-out rails to remove any dirt, debris, or old lubricant. If there’s stubborn grime, you can use a mild cleaner.
- Inspect for Damage: While cleaning, inspect the rails and mechanisms for any signs of damage, wear, or rust. If you notice any issues, you might need to address those before proceeding.
Lubricating the Slide-Out Rails and Mechanisms:
- Choose the Right Lubricant: Use a lubricant specifically designed for RV slide-outs. These are typically dry lubricants that don’t attract dirt and debris. Avoid using standard WD-40 as it can attract dirt. Check our easy to following guide on the best lubricant for slide-outs here.
- Apply Lubricant to Rails: Spray or apply the lubricant evenly along the slide-out rails. Ensure you cover all areas, but avoid over-spraying.
- Lubricate the Mechanisms: Depending on your RV’s design, there might be gears, chains, or other mechanisms that need lubrication. Carefully apply lubricant to these parts without over-applying.
- Move the Slide-Out: After lubricating, retract and extend the slide-out a couple of times. This helps distribute the lubricant evenly and ensures smooth operation.
- Wipe Excess Lubricant: Using a clean cloth, wipe away any excess lubricant to prevent it from attracting dirt.
2. Lubricate Hinges and Locks
Doors, cabinets, windows, and storage compartments in an RV have hinges and locks that can become squeaky or stiff over time. Regularly applying a light lubricant can keep these parts moving smoothly and prevent rust.
Safety First:
- Stabilize the RV: Ensure your RV is on level ground and stabilized. If you’re working on an entry door, make sure the RV is secure from rolling or moving.
Cleaning the Hinges and Locks:
- Inspect for Damage: Before cleaning, inspect the hinges and locks for any signs of damage, wear, or rust. If you notice any issues, consider replacing or repairing the damaged components.
- Clean the Locks: Insert and remove the key a few times to dislodge any debris inside the lock cylinder. If the lock is particularly dirty, consider using a specialized lock cleaner or compressed air to blow out any debris.
Lubricating the Hinges and Locks:
- Choose the Right Lubricant: For hinges, a white lithium grease or a silicone-based lubricant works well. For locks, use a graphite lubricant or a product specifically designed for locks to avoid gumming up the mechanism.
Check our easy to following guide on the best lubricant for RV door hinges. - Lubricate the Hinges: Spray or apply the lubricant to the hinge pivot points. Move the hinge (open and close the door or compartment) several times to distribute the lubricant evenly.
- Lubricate the Locks: For locks, it’s best to use a small amount of lubricant. Insert the lubricant nozzle into the keyhole and give a short spray. Then, insert and remove the key several times to distribute the lubricant inside the lock cylinder.
- Wipe Excess Lubricant: Using a clean cloth, wipe away any excess lubricant from the hinges and locks to prevent it from attracting dirt.
3. Lubricate Window Tracks
The tracks that RV windows slide on can accumulate dirt and debris, making them harder to open or close. Cleaning and then lubricating these tracks can make a significant difference in window operation.
Cleaning the Window Tracks:
- Open the Windows: Start by fully opening the windows to access the tracks.
- Remove Loose Debris: Use a small brush (an old toothbrush works well) to loosen and remove dirt and debris from the tracks.
- Vacuum the Tracks: Use a handheld vacuum or a vacuum with a nozzle attachment to suck up the loosened debris from the tracks.
- Deep Clean: Mix a solution of warm water and a few drops of mild detergent. Dip a cloth or sponge into the solution and wring out excess water. Wipe down the tracks thoroughly. For stubborn grime, you can use the brush again.
- Dry the Tracks: Use a clean, dry cloth to wipe down the tracks and ensure they are completely dry. This prevents rust and ensures the lubricant adheres properly.
Lubricating the Window Tracks:
- Choose the Right Lubricant: A silicone-based lubricant is ideal for window tracks as it doesn’t attract dirt and provides smooth operation. Avoid using oil-based lubricants as they can attract dirt and gum up the tracks.
- Apply Lubricant: Spray or apply the lubricant evenly along the window tracks. Ensure you cover all areas, but avoid over-applying.
- Move the Windows: After lubricating, open and close the windows several times. This helps distribute the lubricant evenly and ensures smooth operation.
- Wipe Excess Lubricant: Using a clean cloth, wipe away any excess lubricant to prevent it from attracting dirt or dripping.
In case you’re new to RV, you might also want to check out these guides:
- What Are The Most Common RV Terms And Jargons?
- A Complete Beginner’s Guide To RV Classes
- What Are The Largest RV Manufacturers And Brands?
4. Lubricate Leveling Jacks
If your RV has leveling jacks, these need to be lubricated to ensure they extend and retract smoothly. This makes setting up camp easier and ensures the jacks operate reliably.
Safety First:
- Stabilize the RV: Ensure your RV is on level ground. If you’re working on the jacks, make sure they are retracted or in a safe position to work on.
- Disconnect Power: If you have electric or hydraulic leveling jacks, ensure the RV is not connected to any power source or turn off the system to avoid accidental activation.
Cleaning the Leveling Jacks:
- Inspect for Damage: Before cleaning, inspect the jacks for any signs of damage, rust, or hydraulic fluid leaks. Address any issues before proceeding.
- Clean the Jacks: Using a clean cloth, wipe down the exposed parts of the jacks to remove dirt, debris, or old lubricant. For stubborn grime or rust spots, you can use a mild cleaner or a mixture of water and mild detergent.
- Clean Hydraulic Components (if applicable): If you have hydraulic jacks, check the hydraulic fluid level and inspect hoses and fittings for any signs of wear or leaks.
Lubricating the Leveling Jacks:
- Choose the Right Lubricant: White lithium grease or a silicone-based lubricant is ideal for leveling jacks. These lubricants resist dirt and debris and provide smooth operation.
- Apply Lubricant: Extend the jacks slightly (if they were retracted) and spray or apply the lubricant to the exposed shaft. Ensure you cover the entire exposed area.
- Operate the Jacks: After lubricating, extend and retract the jacks several times to distribute the lubricant evenly.
- Wipe Excess Lubricant: Using a clean cloth, wipe away any excess lubricant to prevent it from attracting dirt.
5. Lubricate Awning Mechanisms
If your RV has an awning, the moving parts that allow it to extend and retract can become stiff or jammed without proper care. Lubricating these parts can ensure your awning operates smoothly and lasts longer.
Safety First:
- Stabilize the RV: Ensure your RV is on level ground and stabilized.
- Check the Weather: Ensure you’re working on a calm day. Wind can make extending or retracting the awning dangerous.
Cleaning the Awning and Mechanisms:
- Extend the Awning: Carefully extend the awning to access the mechanisms and fabric.
- Clean the Fabric: Using a mixture of water and mild detergent, gently scrub the awning fabric with a soft brush. Rinse thoroughly and allow it to dry completely before retracting.
- Clean the Mechanisms: Wipe down the arms, joints, and other parts of the awning mechanism with a clean cloth to remove dirt, debris, or old lubricant.
Lubricating the Awning Mechanisms:
- 6. Choose the Right Lubricant: A dry silicone-based lubricant is ideal for awning mechanisms. It provides smooth operation without attracting dirt and debris.
Check our easy to following guide on the best lubricant for RV awnings here. - Apply Lubricant: Spray or apply the lubricant to the pivot points, joints, and any moving parts of the awning mechanism. Ensure you cover all areas, but avoid over-spraying.
- Operate the Awning: After lubricating, retract and extend the awning a couple of times to distribute the lubricant evenly and ensure smooth operation.
- Wipe Excess Lubricant: Using a clean cloth, wipe away any excess lubricant to prevent it from attracting dirt or staining the awning fabric.
Inspecting the Awning and Mechanisms: 10. Check for Damage: Inspect the awning fabric for any tears, holes, or signs of wear. Also, check the mechanisms for any signs of damage or misalignment.
- Tighten Loose Components: Over time, screws or bolts on the awning mechanisms can become loose. Tighten any loose components you find.
6. Lubricate Tow Hitch and Coupling
If you tow a vehicle or trailer behind your RV, the hitch mechanism and coupling can benefit from lubrication. This ensures a secure connection and reduces wear from the friction of towing.
Safety First:
- Stabilize the RV: Ensure your RV and the towed vehicle or trailer are on level ground and stabilized.
- Disconnect Power and Brakes: If you have an electric brake system or lights connected, disconnect them before working on the hitch.
Cleaning the Tow Hitch and Coupling: 3. Inspect for Damage: Before cleaning, inspect the hitch, ball, and coupling for any signs of damage, excessive wear, or rust. Address any issues before proceeding.
- Clean the Hitch and Ball: Using a clean cloth, wipe down the hitch and ball to remove dirt, grease, and debris. For stubborn grime, you can use a mild cleaner.
- Clean the Coupling: Wipe down the inside of the coupling mechanism, ensuring it’s free of dirt and old grease.
Lubricating the Tow Hitch and Coupling:
- Choose the Right Lubricant: A high-quality grease designed for towing applications is ideal. This type of grease is designed to withstand the pressures and friction of towing.
- Apply Lubricant to the Hitch Ball: Apply a thin layer of grease to the hitch ball. This reduces friction when the trailer or vehicle is being towed.
- Lubricate the Coupling: Apply a small amount of grease to the inside of the coupling mechanism, ensuring even coverage.
- Lubricate Moving Parts: If your hitch has any moving parts, such as a weight distribution system or sway control, ensure these parts are also lubricated.
Inspecting and Tightening:
- Check for Loose Components: Inspect the hitch, ensuring all bolts, nuts, and pins are secure. Tighten any loose components.
- Inspect Safety Chains: Ensure safety chains are free of damage and are securely attached.
- Check Electrical Connectors: If you have electrical connectors for brakes or lights, ensure they are clean and free of corrosion.
Reconnecting:
- Reconnect the Tow: Carefully reconnect your trailer or towed vehicle to the hitch, ensuring the coupling is secure.
- Test the Connection: Before heading out, do a pull test by trying to pull the trailer forward without uncoupling. This ensures the connection is secure.
- Reconnect Electrical and Brakes: If applicable, reconnect any electrical systems or brakes.
7. Lubricate Seals and Slide-Out Gaskets
While not a traditional area for “lubrication,” slide-out seals and gaskets benefit from a rubber seal conditioner. This keeps them pliable and prevents them from drying out or cracking.
Inspecting the Seals and Gaskets:
- Clean the Area: Before inspecting, clean the seals and surrounding areas with a mild detergent and water. This will help you see any issues more clearly.
- Inspect for Damage: Check the seals and gaskets for cracks, tears, or areas where they might be pulling away from the RV’s structure. Pay special attention to corners and areas where different materials meet.
- Check for Adhesion: Gently tug on the seals to ensure they are still adhered well. If they come off easily, they may need to be replaced or re-adhered.
Cleaning the Seals and Gaskets: 5. Use the Right Cleaner: Use a rubber seal conditioner or a mild detergent mixed with water. Avoid harsh chemicals that can degrade the rubber.
- Gentle Cleaning: Using a soft cloth, gently clean the seals and gaskets, removing any dirt or debris.
Conditioning the Seals and Gaskets:
- Apply a Rubber Seal Conditioner: These conditioners are designed to keep the rubber seals and gaskets pliable and extend their lifespan. Follow the manufacturer’s instructions for the best results.
- Let the Conditioner Set: After applying, let the conditioner sit for the recommended time (usually a few minutes to an hour) before wiping away any excess.
Repairing or Replacing Seals and Gaskets: 9. Remove Damaged Seals: If a seal or gasket is damaged beyond repair, carefully remove it. You may need a scraper or putty knife, but be gentle to avoid damaging the RV’s surface.
- Clean the Area: Before applying a new seal, clean the area thoroughly to ensure good adhesion.
- Apply New Seal: Follow the manufacturer’s instructions to apply the new seal or gasket. Ensure you press it firmly into place for good adhesion.
More Tips for Effective Lubrication of RV Common Areas
- Always clean the area before applying lubricant. Dirt and debris can cause wear, and a clean surface ensures the lubricant works effectively.
- Use lubricants that are specifically designed for the task at hand. For instance, a silicone-based lubricant might be ideal for window tracks, while a thicker grease might be best for chassis components.
- Check your RV’s owner manual. It will often provide guidance on which lubricants to use and how often to apply them.
Regular maintenance, including proper lubrication, can extend the life of your RV and enhance your traveling experience. By paying attention to these common areas and ensuring they’re well-lubricated, you’ll be on the road to many more adventures.