Many people like to think of our RVs as a home away from home, and while you’re out there living your best off-grid life, you definitely want to do it with some luxury.
However, RV components start to age over time and may be subject to damage as well. In this article, we’ll be talking about a bathroom component that you use pretty much every day – the bathroom sink. If you’re wondering how to paint a plastic RV sink, read on to find out more.
You can paint your plastic RV sink simply by using plastic-specific spray or canned paint to paint over the surface of the plastic. These paints are designed to work on and adhere to plastic surfaces much better than regular paints will.
But there is definitely more you should know, so read on to learn more.
Start With Prep work
Before you start painting, you’re going to need to clean your surface thoroughly. In the case of your plastic RV sink, you’ll require the use of some warm water, some dish soap, and a scouring sponge.
Use the sponge dipped in the dish soap mixture to thoroughly remove any grease, grime, or residue that is visible on the surface of your plastic RV sink. Rinse the surface with some water, then dry it with a soft towel.
Before you apply any kind of paint to the clean plastic surface, apply some rubbing alcohol to the entire surface and let it dry thoroughly.
Then, use some 100 or 150-grit sandpaper and get to work on the entire surface of your plastic RV sink.
Sand down the surfaces until there is no shine left, but don’t press down too hard to the point of scratching the surface. With a damp cloth, wipe all the remaining dust off the surface of the sink.
Because plastic is nonporous, removing the shiny top layer helps your plastic paint to adhere much better to the surface.
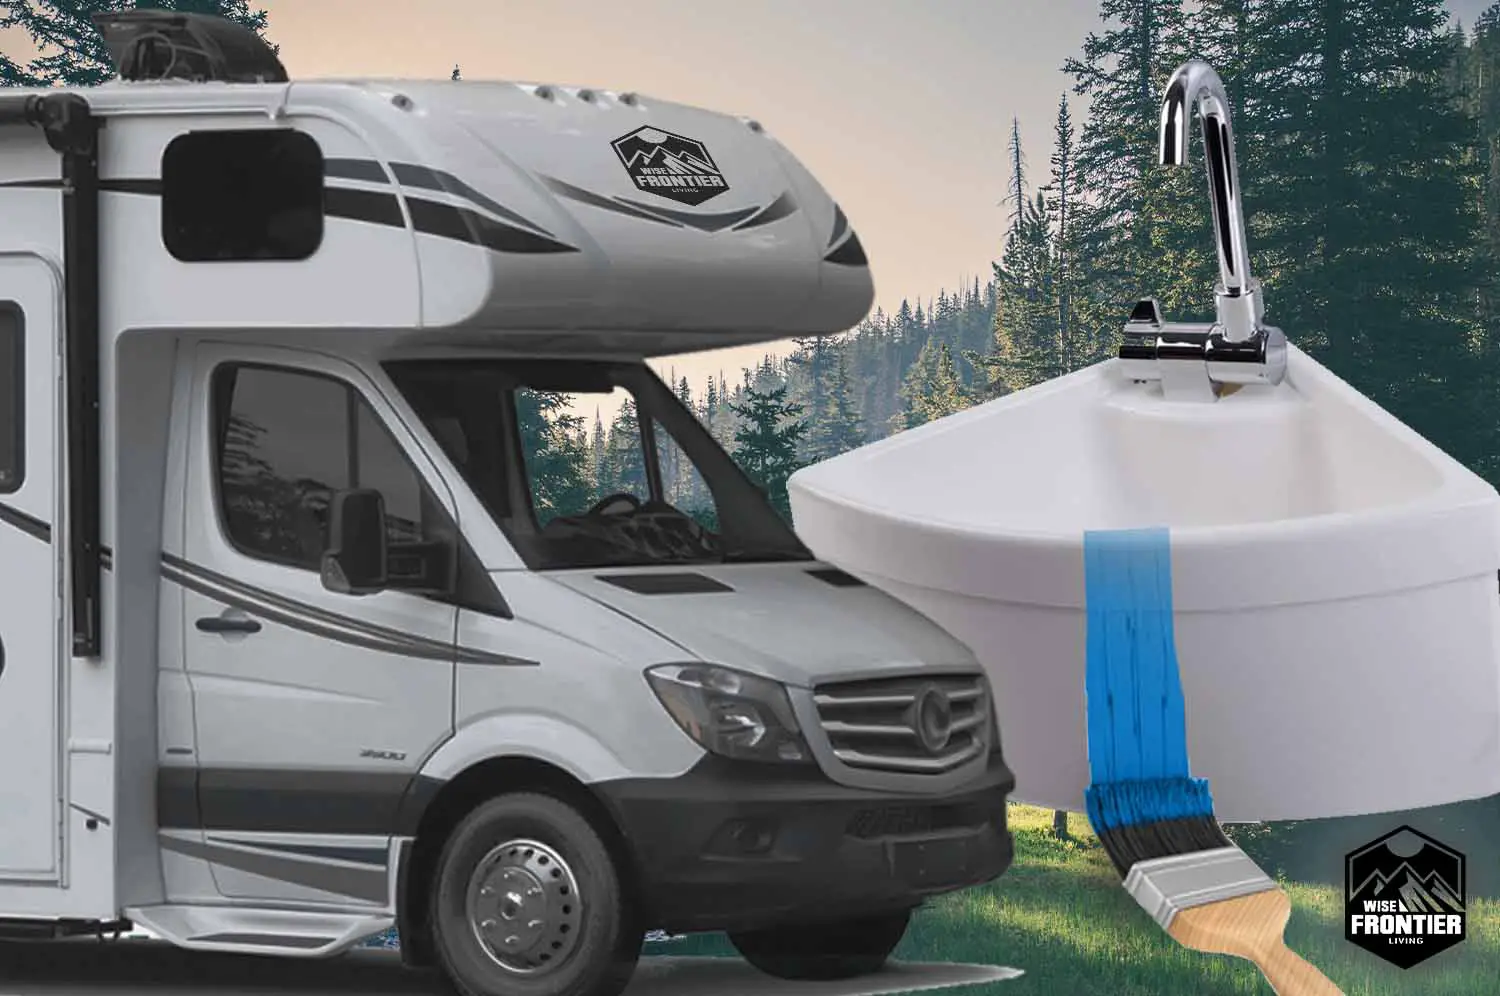
Next, use some painter’s tape and block off any area that you don’t want the new coat of paint to get on. Painter’s tape is made to come off quickly so that you can get straight, clean lines after you’ve finished the job.
Painting plastic sink surface
You can paint your plastic RV sink using a brush or spray. Both ways have advantages and disadvantages, but we’ll get to that later.
If this is your first-time spray painting, read the directions on your can of plastic paint. In general, you’ll need to remember to shake the can thoroughly before your first spray of paint and whenever you’re in-between layers of paint.
Always test your paint can on a piece of cardboard or newspaper before spraying it onto your plastic RV sink surface.
Apply the paint in a single layer by pointing the spray can nozzle at least 12-15 inches away from the surface, then spray a light coat of paint all over the surface.
Let each coating of paint dry before applying the next. You should need at least 2-3 layers depending on the size of your plastic RV sink, but generally, 2 or 3 should be enough.
Brushing is fairly straightforward, all you need to do is dip your brush into the paint and apply it to your plastic RV sink surface in light, even strokes.
Just like spraying, apply thin coats of paint for each layer to create a smoother finish. Avoid applying a thick layer of paint all at once because this is more likely to drip and run, making your finish peel and flake. Just like the spray method, you’ll need 2-3 layers to complete the job.
Using either method, you should allow the paint to dry completely before using the sink. Ideally, you’ll want to leave it overnight for the paint to cure fully.
What kind of paint do you use?
In order to paint on plastic surfaces, you’ll need to use plastic paint. This kind of paint is specially formulated to adhere to plastic surfaces. Some examples include Krylon fusion for plastic, Rust-Oleum Specialty Paint For Plastic, Valspar Plastic Spray Paint, and more.
Otherwise, if you can’t find plastic paint for some reason, you can also use regular paints to paint on plastic surfaces – however, you’ll need an extra step called priming before you are able to adhere plastic paint onto your surfaces. The primer creates a surface on your plastic items that regular paint adheres to easily.
Plastic paint primers can be found on Amazon or at your local hardware store.
Pros and Cons
Here are some pros and cons of painting your plastic RV sink
- Pros
– You give your RV sink a new lease of life
– Won’t need to look for a new RV sink just because it looks dated
– Saves you money in the long run
– One less bathroom component ending up in a landfill
- Cons
– You need plastic-specific paint in order to paint your RV plastic sink
– There’s a considerable amount of prep work needed for the job
– Cleanup and ventilation might be an issue for compact RV spaces
Can I use any color?
Ultimately, the color you use for your RV plastic sink depends on the color that you choose. Also, it depends on what kind of plastic paint colors are available in your local area, or online – wherever you’re planning to buy it from.
If you’re using regular spray or brush paint however, then you definitely have a choice of any color palette you want. You simply have to remember to use a plastic primer to coat the surface of your plastic RV sink so that regular paint can adhere to it.
Brush vs. Spray
There are generally two most common methods of painting, which are brushing and spray painting. Both have their advantages and disadvantages.
Brushing is simply using a paintbrush, dipping it into the paint, and applying the paint onto the surface where you need it to go via brushing it on.
This is the most accurate way of painting, but there is a chance that you will end up with brushstrokes on the finished surface if you’re not careful.
Spraying is using a spray paint can or a spray paint nozzle attachment to apply paint onto surfaces.
While it is easy to use, it is less accurate than brushing, and you’ll need to have a well-ventilated area to use spray paint.
However, it takes less time for cleanup, as you won’t need to clean and dry any brushes after the job is done.
Conclusion
Sprucing up your RV is a great way to make it look and feel homely again, especially if it’s an old one, or if the components look particularly dated or are damaged.
Painting over your plastic component surfaces makes them look brand new, and saves you from having to source, buy, and install a new one.
Plastic paint or plastic primer can also be used on other plastic components in your RV, such as your toilet bowl, sink, or bathroom.
And the best part is, you don’t need any power tools or specific tools. All you need is the plastic paint or primer, some brushes and cleaning materials, sandpaper, and you’re all set to make your RV look brand new again!