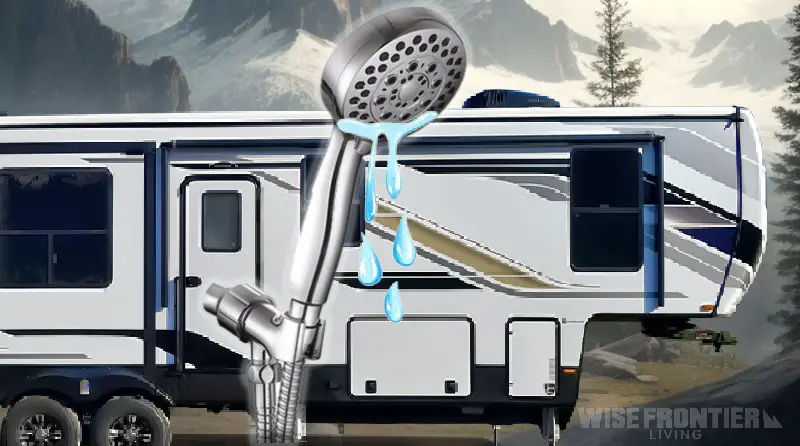
Every RV enthusiast knows the value of a well-functioning shower. After a long day on the road or exploring the great outdoors, there’s nothing quite like the comfort of a warm shower in your home-on-wheels. However, even in the coziest of RVs, certain issues can disrupt this comfort, and one of the most common annoyances is a dripping showerhead.
A dripping showerhead might seem like a minor inconvenience at first. Still, it can lead to several problems: from the wastage of precious water resources and an unexpected increase in your water bill (if you’re at a campground that charges for water usage) to the incessant sound of water droplets that can disturb a peaceful night’s sleep. Moreover, if left unchecked, what starts as a simple drip can sometimes indicate or lead to more significant plumbing issues.
Key Takeaway:
Ensuring a functional RV shower system is vital for a comfortable journey. Common challenges include faulty seals or gaskets, which can be replaced; cracks or damage in the shower head, often addressed with sealants or part replacements; and worn-out cartridges in the faucet, which require cartridge replacements. Tackling these issues promptly with these straightforward solutions conserves water and safeguards the RV’s plumbing, ensuring a seamless and enjoyable RV experience.
In this article, we’ll delve deep into the reasons behind that pesky drip and offer solutions to ensure your RV shower works perfectly, providing you with the relaxation you deserve.
Understanding the Drip
Before diving into the specific causes of a dripping shower head, it’s essential to grasp the basics of how shower systems function, especially within the unique confines of an RV. The mechanics of an RV shower aren’t vastly different from those in a traditional home, but an RV’s compact nature and mobility introduce some unique considerations.
At its core, a shower system consists of a water source, pipes that transport the water, valves that regulate the flow and temperature, and finally, the shower head that disperses the water. When you turn the shower knob or lever, you’re essentially opening a valve that allows water to flow from the source, through the pipes, and out of the shower head. When you shut it off, the valve should close completely, stopping the water flow.

However, in some cases, the water doesn’t stop entirely, leading to the drip. This could be due to a range of reasons, from simple wear and tear to more complex issues within the plumbing system. The challenge is to pinpoint the exact cause and address it effectively. Below is a chart of potential causes and how they should be addressed.
Disclaimer:
Due to the wide variety of RVs in the industry, We cannot provide personalized technical advice. Our information is intended for general educational purposes only and should not be construed as specialized technical advice for any specific situation. Any decisions made based on information provided by us are the sole responsibility of the individual. It is always recommended to seek additional advice from a professional before making any critical mechanical changes or repairs to the RV.
| **Issue** | **How to Address** |
| Faulty Seals or Gaskets | Replace the worn-out seals or gaskets. |
| Residual Pressure | Ensure the water is turned off completely. Consider installing a pressure relief valve. |
| Mineral Buildup | Clean the shower head with a descaling solution. Consider using a water softener for the RV. |
| Worn Out Cartridge | Replace the cartridge in the mixer shower. |
| Faulty Diverter Valve | Replace or repair the diverter valve. |
| Improperly Closed Valves | Ensure the shower valve is turned off completely. |
| High Water Pressure | Install a water pressure regulator. |
| Temperature Fluctuations | Insulate the RV plumbing or adjust water heater settings to minimize drastic temperature changes. |
| Aged Plumbing | Consider replacing old or worn-out plumbing components. |
| Cracks or Damage | Replace the damaged shower head or parts. |
Addressing the Drip: Fix For 3 Common Issues
Fixing Faulty Seals or Gaskets in an RV Shower Head
1. Gather Necessary Supplies:
- Replacement seals or gaskets (ensure they’re the correct size/type for your shower head)
- Adjustable wrench or pliers
- Teflon tape (optional)
- Clean cloth or rag
- Bucket or bowl (to keep parts)
2. Turn Off the Water Supply:
- Ensure that the water supply to the shower is turned off. This might mean shutting off the main water supply to the RV or just the water supply to the bathroom.
3. Remove the Shower Head:
- Using the adjustable wrench or pliers, grip the base of the shower head (where it connects to the arm) and turn counterclockwise to unscrew and remove it. Place it in the bucket or bowl to prevent any parts from getting lost.
4. Locate the Faulty Seal or Gasket:
- Examine the inside of the shower head where it connects to the arm. You should see a rubber seal or gasket. This is what prevents water from leaking out of the connection.
- Check the seal for any signs of wear, damage, or degradation.
5. Remove the Old Seal or Gasket:
- Using your fingers or a small tool, carefully remove the old seal or gasket from the shower head.
6. Clean the Connection Area:
- Wipe the threaded area of the shower head and the shower arm with a clean cloth to remove any mineral deposits or debris.
7. Install the New Seal or Gasket:
- Place the new seal or gasket into the shower head, ensuring it sits snugly and evenly.
- If you’re using Teflon tape, wrap it around the threaded end of the shower arm. This can help ensure a watertight connection.
8. Reattach the Shower Head:
- Screw the shower head back onto the shower arm by turning it clockwise. Ensure it’s tight, but be careful not to overtighten, as this can damage the new seal or gasket.
9. Turn On the Water Supply:
- Restore the water supply to the shower or RV.
- Test the shower head by turning it on and checking for any leaks at the connection point.
10. Monitor for Leaks:
- Over the next few uses, keep an eye on the connection to ensure there are no drips or leaks. If you notice any, you might need to tighten the connection a bit more or check the placement of the new seal or gasket.
Addressing Cracks or Damage in an RV Shower Head
1. Gather Necessary Supplies:
- Replacement shower head or parts (if needed)
- Adjustable wrench or pliers
- Teflon tape
- Clean cloth or rag
- Epoxy or waterproof sealant (for minor repairs)
2. Turn Off the Water Supply:
- Ensure that the water supply to the shower is turned off. This might mean shutting off the main water supply to the RV or just the water supply to the bathroom.
3. Inspect the Shower Head:
- Before making any repairs, thoroughly inspect the shower head to identify all cracks, damage, or areas of concern.
4. Decide on Repair or Replacement:
- If the damage is minor (like a small crack), you might be able to repair it. However, for more significant damage or if the shower head is old, it’s often better to replace it entirely.
5. Repairing Minor Damage:
- Clean the damaged area thoroughly with the cloth.
- Apply a small amount of epoxy or waterproof sealant to the crack or damaged area. Follow the product’s instructions regarding drying or curing time.
- Once cured, test the repair by turning on the water and ensuring there’s no leakage.
6. Replacing the Shower Head or Damaged Parts:
- Using the adjustable wrench or pliers, grip the base of the shower head (where it connects to the arm) and turn counterclockwise to unscrew and remove it.
- If you’re only replacing a part of the shower head, disassemble it as needed, replace the damaged component, and reassemble.
- If replacing the entire shower head, wrap Teflon tape around the threaded end of the shower arm to ensure a watertight connection.
- Screw the new (or repaired) shower head onto the shower arm by turning it clockwise. Ensure it’s tight, but be cautious not to overtighten.
7. Turn On the Water Supply:
- Restore the water supply to the shower or RV.
- Test the shower head by turning it on, checking for proper water flow and ensuring there are no leaks at the connection point or from the repaired area.
8. Monitor the Shower Head:
- Over the next few uses, keep an eye on the repaired or replaced area to ensure there are no further issues or leaks.
Replacing a Worn-Out Cartridge in an RV Shower Faucet
1. Gather Necessary Supplies:
- Replacement cartridge (ensure it’s the correct type for your faucet model)
- Adjustable wrench or pliers
- Screwdriver (Phillips or flat-head, depending on your faucet)
- Clean cloth or rag
- Bucket or bowl (to keep parts)
2. Turn Off the Water Supply:
- Ensure that the water supply to the shower is turned off. This might mean shutting off the main water supply to the RV or just the water supply to the bathroom.
3. Remove the Faucet Handle:
- Most shower faucets have a decorative cap on the handle. Gently pry this cap off using the edge of the screwdriver.
- Once the cap is removed, you’ll see a screw securing the handle to the faucet. Unscrew it and carefully pull the handle off.
4. Remove the Trim and Sleeve (if present):
- Some shower faucets have a decorative trim or sleeve around the cartridge area. If yours does, gently pull or unscrew it to expose the cartridge.
5. Locate the Cartridge:
- With the handle and trim removed, you should see the cartridge. It’s the component that regulates the flow and temperature of the water.
6. Remove the Old Cartridge:
- Using the adjustable wrench or pliers, grip the cartridge and gently turn it counterclockwise (if it’s threaded) or pull straight out (if it’s not threaded). Some cartridges might have retaining clips or screws; ensure you remove these first.
7. Install the New Cartridge:
- Insert the new cartridge into the faucet. Ensure it’s oriented correctly, as some cartridges have a specific up/down or hot/cold orientation.
- If the old cartridge had retaining clips or screws, replace these to secure the new cartridge.
8. Reattach the Trim, Sleeve, and Handle:
- If your faucet had a trim or sleeve, replace it now.
- Place the handle back onto the faucet stem and secure it with the screw. Finally, snap or screw the decorative cap back onto the handle.
9. Turn On the Water Supply:
- Restore the water supply to the shower or RV.
- Test the shower by turning it on and adjusting the temperature. Ensure there are no leaks and that the temperature adjusts correctly.
10. Monitor for Proper Function:
- Over the next few uses, ensure that the faucet operates smoothly and maintains the desired temperature. If you notice any issues, you might need to check the cartridge’s placement or ensure all components are tightened properly.
Upgrades and Enhancements for Your RV Shower System
While addressing immediate issues with your RV shower head is crucial, sometimes the best solution is to upgrade or enhance your system. Modern advancements in RV shower fixtures offer improved functionality, water conservation, and even luxurious experiences. Here’s a look at some options and their benefits:
1. High-Efficiency Shower Heads:
- Benefits: These shower heads are designed to provide a satisfying shower experience while using less water. They often incorporate aeration techniques, giving the sensation of a full flow without the wastage.
- Recommendation: Look for models specifically designed for RVs, ensuring compatibility and ease of installation.
2. Shower Panels:
- Benefits: Shower panels can transform your RV shower experience. They often come with multiple spray options, from rainfall to massage jets, offering a spa-like experience.
- Recommendation: Ensure the panel fits comfortably within your RV’s shower space and that it’s suitable for the water pressure levels in an RV.
3. Thermostatic Shower Valves:
- Benefits: These valves maintain your desired water temperature by automatically adjusting the mix of hot and cold water. This means no more sudden temperature spikes or drops.
- Recommendation: Opt for models that are compact and designed for the unique water systems of RVs.
4. Water Softeners and Filters:
- Benefits: If you frequently encounter hard water on your travels, a water softener can prevent mineral buildup in your shower system. Filters can remove impurities, ensuring a cleaner and healthier shower.
- Recommendation: Look for systems designed for RV use, considering both installation ease and maintenance.
5. Extended Shower Hoses:
- Benefits: A longer hose can provide more flexibility, especially in the confined space of an RV shower. It’s particularly useful if you have pets or need to reach various angles.
- Recommendation: Ensure the hose material is durable and resistant to kinks.
6. Digital Shower Controls:
- Benefits: These allow you to set and control your shower preferences digitally, from water temperature to flow rate. Some even come with memory functions, recalling your preferred settings.
- Recommendation: Ensure the system is compatible with RV electrical systems and that it can handle the typical water pressure in an RV.
Before You Leave: A Parting Gift of Wisdom!
The RV lifestyle offers a unique blend of adventure, freedom, and comfort. Essential to that comfort is a well-functioning shower system. While issues like drips, cracks, or worn-out components can occasionally disrupt this comfort, understanding the root causes and knowing how to address them ensures that these problems are but minor bumps on the road.
Moreover, with the plethora of upgrades and enhancements available today, your RV shower can be more than just functional—it can be a luxurious oasis in your mobile home. As with all aspects of RV maintenance, being proactive, conducting regular checks, and addressing issues promptly will ensure a smoother journey and a more enjoyable living experience.